Thursday, January 31, 2013

How to Get Email Headers – A Guide from MxToolBox


When reporting spam that slips past the filters, it is essential that we receive the full message headers from a message. Additionally, sometimes our Support department may request the full headers from an email message in order to troubleshoot mail delivery problems.
Every single Internet e-mail message is made up of two parts the header and the message body of the email. Every single email you send or receive on the Internet contains an Internet Header, a full and valid e-mail header provides a detailed log of the network path taken by the message between the mail sender and the mail receiver(s) (email servers).
Your email client program will usually hide the full header or display only lines, such as From, To, Date, and Subject, see below for more information on pulling headers for your email client:
Note: Please put a short but descriptive note in the subject or the body of the message so we can quickly assess your issue or problem.
Note: If you need assistance in understanding email headers, please feel free to use our Email Header Analyzer.

Wednesday, January 30, 2013

Export Email, DL Update, DL Members


Export-Mailbox -id mailbox@domain.com -TargetMailbox ExportMB@domain.com -TargetFolder SpamMailExp -SubjectKeywords "subject key words" -StartDate "23/01/2013"


Get-Content "C:\temp_\Users.txt" | Add-DistributionGroupMember -Identity "DL"

Import-Csv "C:\temp_\Users.csv" | foreach {Add-DistributionGroupMember  -Identity "DL"  -Member $_.EmailId}


Get-DistributionGroupMember -identity "DL-NAME" -ResultSize Unlimited | export-csv -NoTypeInformation -path "C:\temp_\dlusers.csv"

Get-ADGroupMember "SEC-GROUP-NAME" | Get-ADUser | Select-Object Name, mail | Export-Csv -Path "C:\Temp_\User.csv" -NoTypeInformation

Tuesday, January 29, 2013

Exchange Server 2013 Mail Flow


As people learn about the new features of Exchange Server 2013 one of the first surprises is often the reduction in server roles to just two; the Client Access server and the Mailbox server.
The questions that follow are usually along the lines of:
  • How does the mail flow work without a Hub Transport server?
  • Where did the Edge Transport server go?

Exchange Server 2013 Transport Services

The Hub Transport server role from Exchange 2007 and 2010 has been replaced with a series of services running on the remaining server roles.
The Client Access server role hosts the Front End Transport service, which provides filtering of email traffic (eg antispam agents), and routing of email between the internal Exchange servers and the outside world
The Mailbox server role hosts two additional services:
  • Hub Transport service – performs email routing within the organization, and between the Front End transport service and the Mailbox Transport service
  • Mailbox Transport service – passes email messages between the Hub Transport service and the mailbox database
There are some additional scenarios for the Mailbox server’s Transport services when Database Availability Groups are deployed, but for the moment we’ll just consider non-DAG scenarios.
Microsoft has published this diagram that gives a good visual representation of how these components all fit together. But if you find it a little confusing simply read on for a few practical examples.
Exchange Server 2013 Mail Flow – Source: TechNet

Internal Mail Flow Example

Let’s take a look at an internal mail flow example for Exchange Server 2013. In this case the sender and recipient are both on the same mailbox database on the same server, MB2.exchange2003demo.com.
The message headers look like this (I’ve truncated the data that is not relevant to this topic):
Received: from MB2.exchange2013demo.com (192.168.0.188) by
 MB2.exchange2013demo.com (192.168.0.188) with Microsoft SMTP Server (TLS) id
 15.0.466.13; Tue, 31 Jul 2012 21:52:45 +1000

Received: from MB2.exchange2013demo.com (192.168.0.188) by
 MB2.exchange2013demo.com (192.168.0.188) with Microsoft SMTP Server (TLS) id
 15.0.466.13; Tue, 31 Jul 2012 21:52:43 +1000

Received: from MB2.exchange2013demo.com ([fe80::9ca9:e0d9:ec3a:996b]) by
 MB2.exchange2013demo.com ([fe80::9ca9:e0d9:ec3a:996b%12]) with mapi id
 15.00.0466.010; Tue, 31 Jul 2012 21:52:42 +1000
Running the header through the MX Toolbox header analyzer gives us this visual representation.
Exchange Server 2013 Internal Mail Flow Example
What we see are three hops all on the same Mailbox server MB2.exchange2013demo.com, as the message travels through each of the services involved.
Exchange 2013 Internal Mail Flow Hops
Now compare that to an email sent between two Exchange Server 2010 recipients on the same mailbox database.
Received: from HO-EX2010-MB2.exchangeserverpro.net (10.1.1.22) by
 HO-EX2010-MB1.exchangeserverpro.net (10.1.1.21) with Microsoft SMTP Server
 (TLS) id 14.2.309.2; Tue, 31 Jul 2012 22:22:07 +1000

Received: from HO-EX2010-MB1.exchangeserverpro.net
 ([fe80::d957:3403:56cf:a8cb]) by HO-EX2010-MB2.exchangeserverpro.net
 ([fe80::f148:390:568f:38dc%16]) with mapi id 14.02.0309.002; Tue, 31 Jul 2012
 22:22:03 +1000
Exchange Server 2010 Internal Mail Flow Example
This time we only see two hops in the message headers.
Exchange Server 2010 Internal Mail Flow Hops
The best way I can think to describe this difference is that instead of message submission occurring directly via RPC/MAPI between the mailbox database and a Hub Transport server in Exchange 2010, it now traverses the intermediary Mailbox Transport service adding at the very least one additional SMTP hop in the message headers.
You will also note that the example for Exchange Server 2013 demonstrated that the Client Access server’s Front End Transport service was not involved for internal mail flow.

External Mail Flow Example

Now let’s take a look at an external mail flow example, specifically an email from the internet to a mailbox on an Exchange Server 2013 server.
Exchange Server 2013 External Mail Flow Example
The first three hops relate belong to Google, and the two that are obscured are another SMTP service involved in this particular mail flow path but not relevant to the Exchange behaviour.
The first Exchange server is an Exchange 2010 Edge Transport, which is configured to route the email to the Exchange 2013 Client Access server CA1.exchange2013demo.com, which then routes it on to the Mailbox server MB1.exchange2013demo.com.
Exchange Server 2013 External Mail Flow Hops
As you can see the Client Access server role in Exchange 2013 performs mail routing for external emails, but not internal emails. And once again we can see in the final hop MB1 -> MB1 as the message is passed between the Hub Transport service and the Mailbox Transport service on that server.

Default Receive Connector for Incoming Internet Email

Unlike Exchange 2007 and 2010 Hub Transport servers which were not configured by default to accept incoming email from the internet, when an Exchange 2013 Client Access server is installed it is pre-configured with a Receive Connector named “Default Frontend <servername>” that allows “Anonymous Users” to connect.
Exchange Server 2013 Frontend Receive Connector
So where Exchange 2007/2010 were secured by default and required the administrator to either deploy Edge Transport servers, or reconfigure the Hub Transport to perform the internet-facing role, Exchange Server 2013 Client Access servers are configured by default for the internet-facing role.

Exchange Server 2013 Message Queues

One of the interesting things about the three transport services in Exchange Server 2013 is that only one of them will actually queue messages locally.
  • Front End Transport service – no local queuing
  • Hub Transport service – local queuing
  • Mailbox Transport service – no local queuing
To test this out I simply stopped the Hub Transport service on my Exchange 2013 server, and then used Telnet to send a test email message via the Front End Transport service.
After completing my commands in the Telnet session I received this error:
451 4.7.0 Temporary server error. Please try again later. PRX3
If another email server was sending the email message it would likely queue on that server until it was able to retry and successfully submit the message. However I would anticipate that some mail-enabled devices and applications will not handle this situation very well and it may lead to message failure.
I suspect the solution to this is to continue pointing to the Mailbox server’s Hub Transport service for device/application SMTP requirements, not the Client Access server as you might assume from its default Receive Connector configuration.

Exchange Server 2013 Edge Transport Server?

So if the Exchange 2013 Client Access server is pre-configured for the internet-facing transport role, where does that leave the Edge Transport role?
For starters, there is no Edge Transport role in the Exchange 2013 Preview, and Microsoft has stated that Edge Transport will not ship with Exchange 2013 RTM.
Whether it will ship with a later service pack or not at all is still an unknown, but there has been speculation that the Edge Transport server role will not exist in future.
Interestingly the guidance from Microsoft if not using EdgeSync is to establish SMTP connectivity between the Edge Transport server and the Exchange 2013 Mailbox server, which means that I’m currently doing it “wrong” in my own lab by routing the email from Edge Transport to Exchange 2013 Client Access.

Summary

As you can see the mail flow for Exchange Server 2013 is not that different to that in previous versions of Exchange once you shift your mindset from the server roles in previous versions to the specific services involved in Exchange Server 2013 mail flow.

Thursday, January 24, 2013

Exchange 2013 Successfully Installed & So &So


Got an error immediately after the installation. It needs 15 minutes time to get mailbox created


Searching for the solutions :(

Wednesday, January 23, 2013

Export\Delete Email in Any Mailbox Exchange 2007

Export-Mailbox -id ArchiveMgr_Journal@biocon.com -TargetMailbox miguser@biocon.com -TargetFolder SpamMailExp -SubjectKeywords "::Tax Refunds Notification . ." -StartDate "23/01/2013"

Tuesday, January 22, 2013

For manage saved network password on windows os

Start Menu \ Run \ Type :- rundll32.exe keymgr.dll,KRShowKeyMgr Press OK

You can also use :- Control Userpasswords2

Click the Advanced tab and then click Manage Passwords.

Thursday, January 10, 2013

Database Availability Groups 2010\2013


Database Availability Groups:


A database availability group (DAG) is the base component of the high availability and site resilience framework built into Microsoft Exchange Server 2013. A DAG is a group of up to 16 Mailbox servers that hosts a set of databases and provides automatic database-level recovery from failures that affect individual servers or databases.
A DAG is a boundary for mailbox database replication, database and server switchovers, failovers, and an internal component called Active Manager. Active Manager, which runs on every server in a DAG, manages switchovers and failovers.
Any server in a DAG can host a copy of a mailbox database from any other server in the DAG. When a server is added to a DAG, it works with the other servers in the DAG to provide automatic recovery from failures that affect mailbox databases, such as a disk failure or server failure.


To illustrate how a DAG can provide high availability for your mailbox databases, consider the following example, which uses a DAG with five members. This DAG is illustrated in the following figure.
DAG with five members


Database Availability Group
In the preceding figure, the green databases are active mailbox database copies and the blue databases are passive mailbox database copies. In this example, the database copies aren't mirrored across each server, but rather spread across multiple servers. This ensures that no two servers in the DAG have the same set of database copies, providing the DAG with greater resilience to failures, including failures that occur while other components are unavailable as a result of regular maintenance.
Consider the following scenario, using the preceding example DAG, which illustrates resilience to multiple database and server failures.
Initially, all databases and servers are healthy. You need to install some operating system updates on EX2, so you put the server into maintenance mode. This causes a server switchover, which activates the copy of DB4 on another Mailbox server. A server switchover moves all active mailbox database copies from their current server to one or more other Mailbox servers in the DAG in preparation for a scheduled outage for the current server. In this example, there's only one active mailbox database on EX2 (DB4), so only one active mailbox database copy is moved.
DAG with a server offline for maintenance

Database Availability Group with a Server Offline
While you perform maintenance on EX2, EX3 experiences a catastrophic hardware failure and goes offline. Prior to going offline, EX3 hosted the active copy of DB2. To recover from the failure, the system automatically activates the copy of DB2 that's hosted on EX1 within 30 seconds. This is illustrated in the following figure.
DAG with a server offline for maintenance and a failed server

DAG with a server offline and a failed server
After the scheduled maintenance is completed for EX2, you bring the server online and take it out of maintenance mode. As soon as EX2 is available, the other members of the DAG are notified, and the copies of DB1, DB4, and DB5 hosted on EX2 are automatically synchronized with the active copy of each database. This is illustrated in the following figure.
DAG with a restored server synchronizing its database copies


DAG with restored server resynchronizing databases
After the failed hardware component in EX3 is replaced with a new component, EX3 is brought online. After EX3 is available, the other members of the DAG are notified, and the copies of DB2, DB3, and DB4 hosted on EX3 are automatically synchronized with the active copy of each database. This is illustrated in the following figure.
DAG with a repaired server synchronizing its database copies
DAG with Member Resynchronizing Database Copies


In addition to providing high availability within a datacenter, a DAG can also be extended to one or more datacenters in a configuration that provides site resilience for one or multiple datacenters. In the preceding example figures, the DAG is located in a single datacenter and single Active Directory site. Incremental deployment can be used to extend this DAG to a second datacenter (and a second Active Directory site) by deploying a Mailbox server and the necessary supporting resources (one or more Active Directory servers, and DNS services). The Mailbox server is then added to the DAG, as illustrated in the following figure.
DAG extended across two Active Directory sites

DAG extended across two Active Directory sites
In this example, a passive copy of each active database in the Redmond datacenter is configured on EX6 in the Dublin datacenter. However, there are many other examples of DAG configurations that provide site resilience. For example:
  • Instead of hosting only passive database copies, EX6 could host all active copies, or it could host a mixture of active and passive copies.
  • In addition to EX6, multiple DAG members could be deployed in the Dublin datacenter, providing protection against additional failures. This configuration also provides additional capacity, so that if the Redmond datacenter fails, the Dublin datacenter can support a much larger user population.


In the preceding example, a single DAG extends across multiple datacenters, providing site resilience for either or both datacenters. When using a single DAG to provide site resilience in an environment where each datacenter to which you extend the DAG has an active user population, there is a single point of failure in the wide area network (WAN) connection. This is because quorum requires a majority of the voters to be active and able to communicate with each other.
In the preceding example, the majority of voters are located in the Redmond datacenter. If the Dublin datacenter hosts active mailbox databases, and it has a local user population, a WAN outage would result in a messaging service outage for the Dublin users. When WAN connectivity breaks, only the DAG members in the Redmond datacenter retain quorum and continue providing messaging service.
To eliminate the WAN as a single point of failure when you need to provide site resilience for multiple datacenters that each have an active user population, you should deploy multiple DAGs, where each DAG has a majority of voters in a separate datacenter. When a WAN outage occurs, replication will be blocked until connectivity is restored. Users will have messaging service, because each DAG continues to service its local user population.


Wednesday, January 9, 2013

Exchange 2013-Service 'MSExchangeTransport' failed to reach status 'Running' on this server

Service 'MSExchangeTransport' failed to reach  status 'Running' on this server


Solution:

IPv 6 needs to be enabled for installing exchange 2013

Exchange 2013 RTM Installation Step by Step

Hello Messaging Experts, Now its time for exploring the MS Exchange 2013 and I wanna publish the info collected in a single page

Nice Video about 2013 installation:

www.youtube.com/watch?v=cnklpCaVIpg

Step by Step Installation:

http://akfash.wordpress.com/2012/11/19/installing-exchange-server-2013-step-by-step/


Installing Exchange Server 2013 Step by Step

1
The following is the step by step guide on how to install Microsoft Exchange Server 2013 RTM.
The environment:
  • Windows Server 2012 Active Directory with Windows Server 2012 Forest and Domain functional level
  • Windows Server 2012 member server which is to be installed with Exchange Server 2013
Installation Steps
On the member server install the Remote Server Administration Tools using PowerShell
Install-WindowsFeature RSAT-ADDS
Install the Exchange Server 2013 Prerequisites (run the below command using PowerShell)
Install-WindowsFeature AS-HTTP-Activation, Desktop-Experience, NET-Framework-45-Features, RPC-over-HTTP-proxy, RSAT-Clustering, RSAT-Clustering-CmdInterface, Web-Mgmt-Console, WAS-Process-Model, Web-Asp-Net45, Web-Basic-Auth, Web-Client-Auth, Web-Digest-Auth, Web-Dir-Browsing, Web-Dyn-Compression, Web-Http-Errors, Web-Http-Logging, Web-Http-Redirect, Web-Http-Tracing, Web-ISAPI-Ext, Web-ISAPI-Filter, Web-Lgcy-Mgmt-Console, Web-Metabase, Web-Mgmt-Console, Web-Mgmt-Service, Web-Net-Ext45, Web-Request-Monitor, Web-Server, Web-Stat-Compression, Web-Static-Content, Web-Windows-Auth, Web-WMI, Windows-Identity-Foundation
Upon running the above command Restart your server
Apart from the above, you would have to install the below
Now the prerequisites installation is done and we can move on to installing Exchange Server 2013
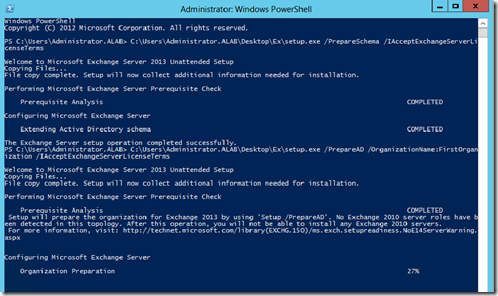
Prepare Schema and AD
Prepare the Active Directory Schema to install Exchange Server 2013 (basically this will extend the schema). You will have to insert the Exchange Server 2013 RTM DVD (Media Kit)
– Assumption, DVD ROM drive letter is D:\ and Exchange Server Installation Setup path is D:\Setup.exe –
  • Open PowerShell or CMD in admin mode
D:\Setup.exe /PrepareSchema /IAcceptExchangeServerLicenseTerms
Or
D:\Setup.exe /PS /IAcceptExchangeServerLicenseTerms
1a
  • Now that the Schema is being prepared, we will have to move on to the next step and prepare the Active Directory Topolgy.
Before you run this command you should have your Exchange Server 2013 Organization name
D:\Setup.exe /PrepareAD /OrganizationName:<name> /IAcceptExchangeServerLicenseTerms
Or
D:\Setup.exe /PAD /OrganizationName:<name> /IAcceptExchangeServerLicenseTerms
2a
Now that the Schema and the AD are prepared,
Run the Exchange Server Setup from the DVD (Run as Administrator)
3
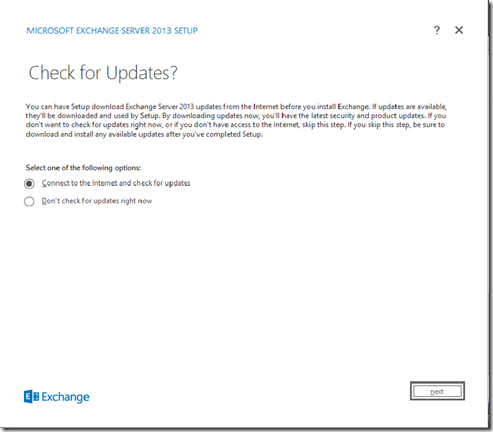
It will request to check for updates, select Connect to the internet and check for updates and click next
4
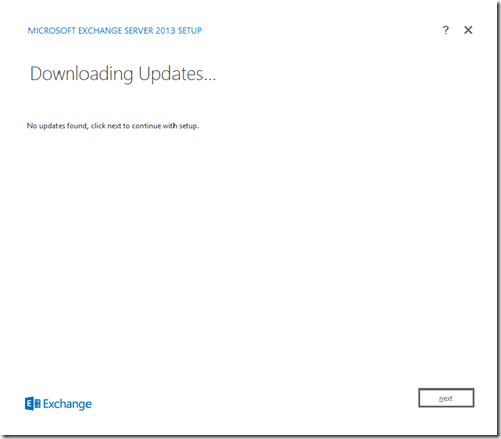
necessary updates will be downloaded , in my case there was no updates
5
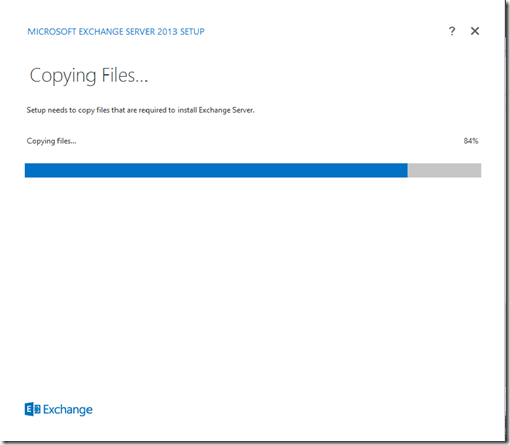
Files are being copied to install Exchange Server 2013
6
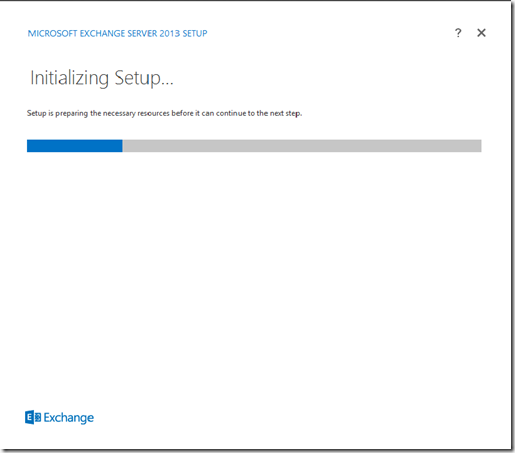
Initializing the Exchange Server 2013 Setup
7
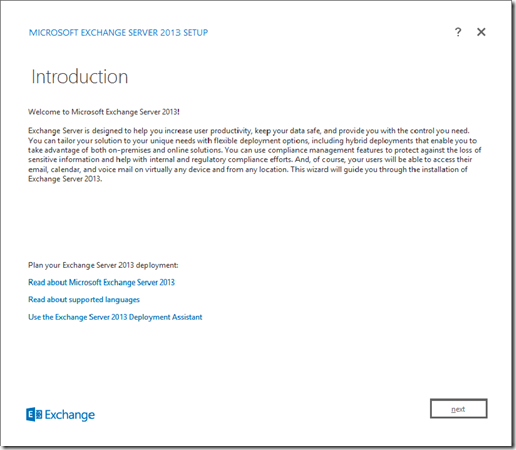
Gives and Introduction to the Exchange Server 2013, upon reading click next
8 
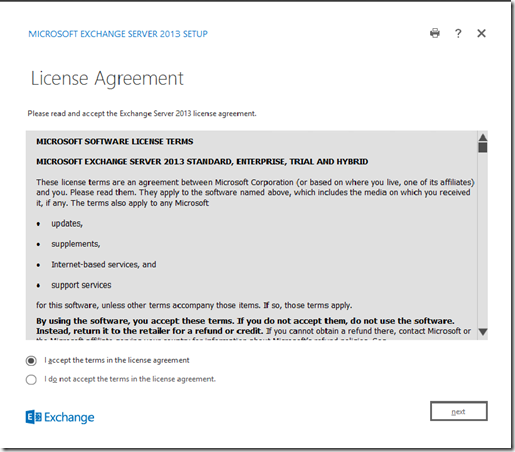
Accept the License Agreement (you are supposed to read this) and click next
9
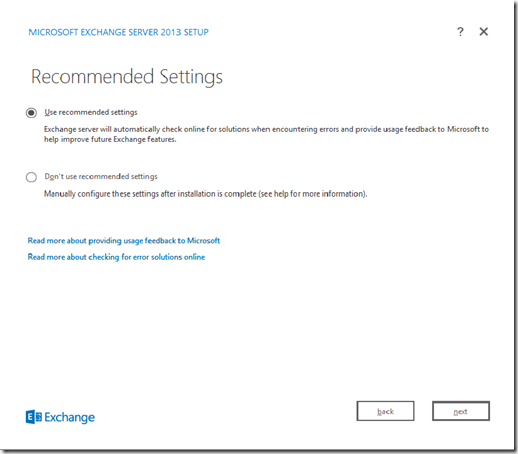
I will have left the default setting of selecting the “Use Recommended Settings” option and click next
10
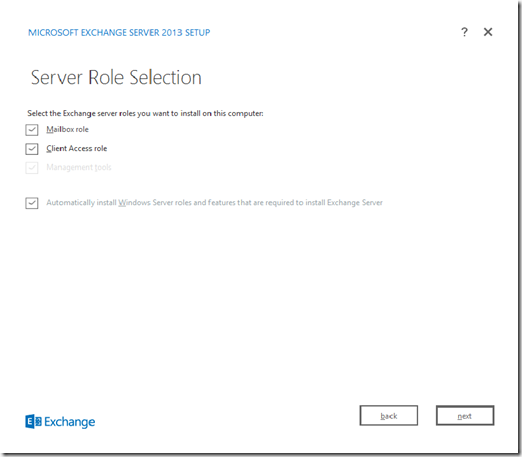
The Server roles that are to be installed select and click next. Notice that Exchange Server 2013 does not contain all the server roles that were introduced in Exchange 2007 and 2010. It has been reduced to 2 now (to read more click here)
11
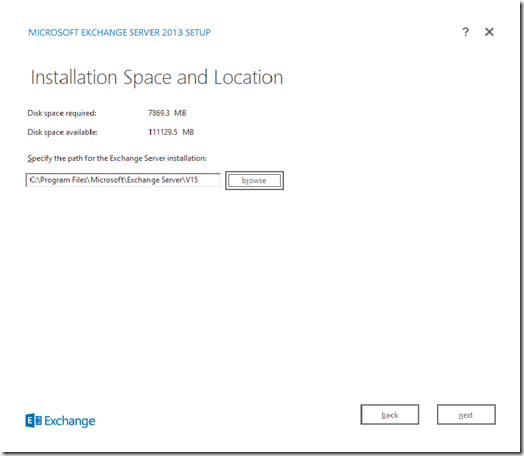
The path of the installation and the required space for the installation. click next upon making the changes
12
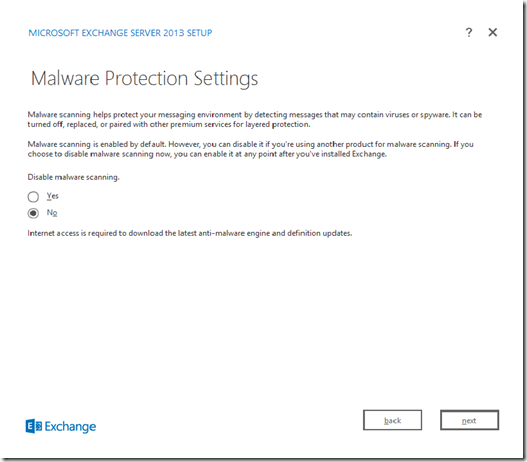
Malware Protection Settings – I am leaving it on – default setting and click next
13
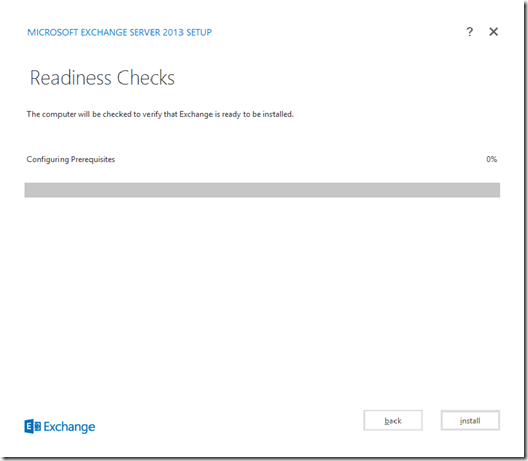
Readiness check – whether your server is ready for Exchange 2013, click install once done
14
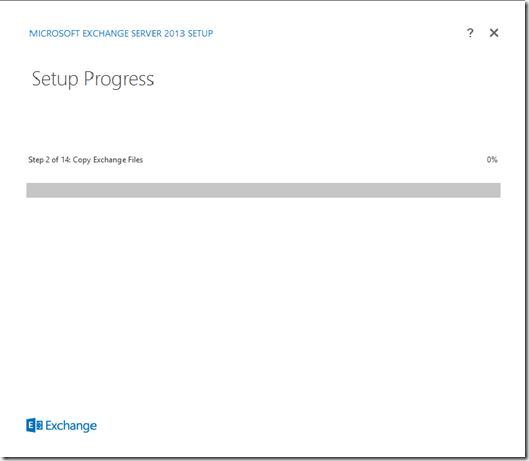
Installation begins and it has 14 steps. It will take some time
15
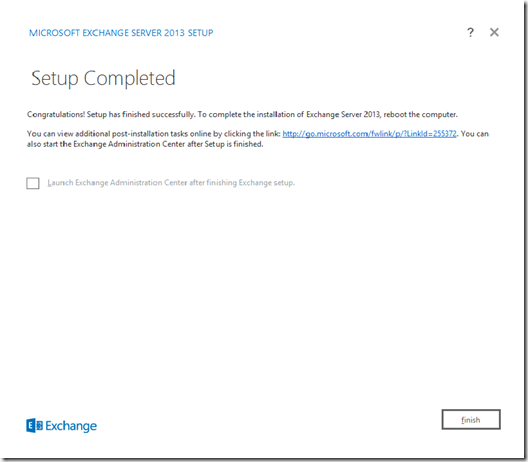
Setup completion, read and click finish.
16
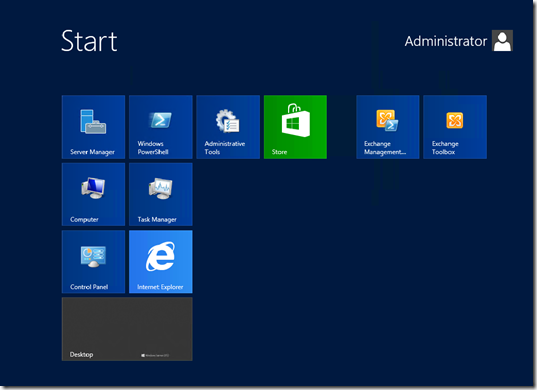
Exchange Server 2013 program shortcuts on Windows Server 2012. Note that the Exchange Management Console (EMC) is no where to be seen. This is because the traditional EMC is being moved to a web interface
17
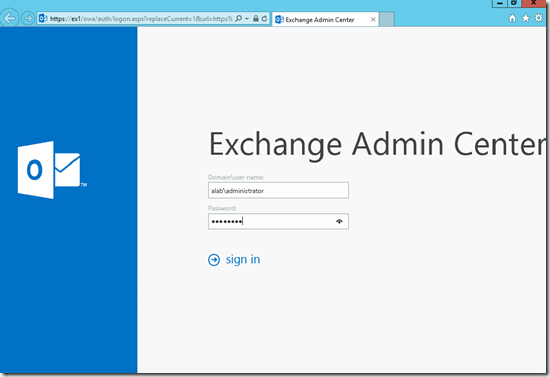
Log in page for the Web Based Exchange Admin center (Equivalent to EMC). login using your admin credentials
18
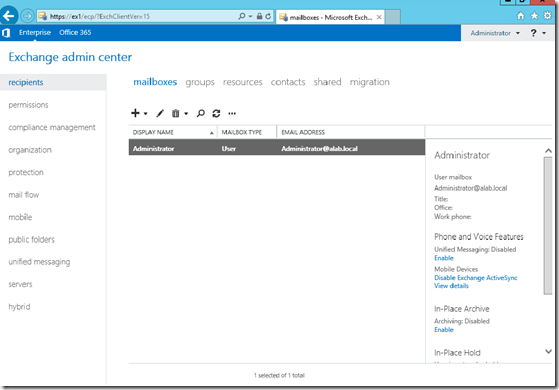
The admin center interface.

Disable IPv6


Yes certainly you can disable the IPV6 without harm if your not using iv6 enabled applications in your infrastructure.

There are some instances where it is offered to disable ipv6 http://support.microsoft.com/default.aspx/kb/952842

to completely remove the ipv6 from your computer please do the following

    
Right Click Network Places
Select Manage Network Connections For each enabled and used NIC
Right Click - Local Area Connection - Select Properties
Networking Tab                               
DeSelect IPv6
Close

after doing the above procedure you might have to use the registry editor aswell to completely disable the ipv6 tunnel

To completely disable IPv6 on a Windows Server 2008-based computer yourself, follow these steps:
  1. Open Registry Editor.
  2. Locate the following registry subkey:
    HKEY_LOCAL_MACHINE\SYSTEM\CurrentControlSet\Services\Tcpip6\Parameters
  3. In the details pane, click New, and then click DWORD (32-bit) Value.
  4. Type DisabledComponents, and then press ENTER.
  5. Double-click DisabledComponents, and then type 0xffffffff in Hexadecimal or 4294967295 in Decimal.

    Note The 0xffffffff value or the 4294967295 value disables all IPv6 components except for the IPv6 loopback interface.

Tuesday, January 8, 2013

OWA & ActiveSync Count with Powershell

Get-CASMailbox -ResultSize Unlimited | where {$_.owaenabled -eq $TRUE} | sort-object Name,Email | Export-CSV path c:\temp\OWA.csv